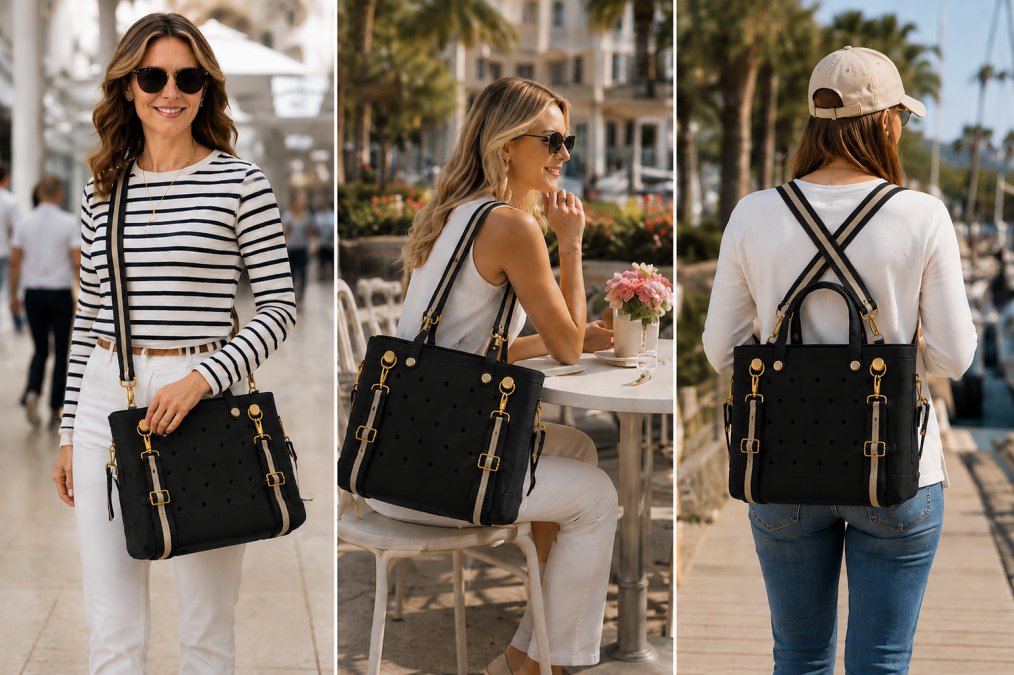
Your tote bag (canvas, leather, straw, or a Bogg-style bag with handle holes)
Two D-rings, 2.5 to 4 cm wide
One adjustable strap, 2 cm to 5 cm wide
Heavy-duty thread (polyester or nylon)
A sewing machine with a denim or leather needle
Fabric scissors, pins, and a seam ripper
A thimble and hand-sewing needle for touch-ups
Pro TipCheck the fabric weight before you buy hardware. A heavy canvas tote that carries real weight needs sturdy metal D-rings, ideally with a stated load rating from the seller. Lightweight straw totes can use thinner rings.
Now let's look at the fastest route, which needs no sewing at all.
The No-Sew Crossbody Bag Hack Anyone Can Do
The fastest no-sew crossbody bag hack is clipping a strap directly to the tote's existing handle holes or loops, no needle, thread, or machine.
Here is how it works:
Lay your tote flat and find the handle attachment points on both sides.
Clip one connector to the left handle loop.
Clip the second connector to the right handle loop.
Snap your adjustable strap onto both connectors.
Slide the strap adjuster until the bag sits at hip height.
If your tote's original handles are worn or broken, our guide to strap wraps vs. replacement straps can help you decide what to fix first.
How to Attach D-Rings to a Tote Bag
Attaching D-rings to a tote bag means sewing or clamping a metal ring to each side seam so a strap can clip on. Placement matters more than technique, because of load path.
How To Make a Zipper Tote Bag Into Crossbody Bag | DIY Zipper Tote Bag Into Crossbody Bag
Qrei Handmade
Sew-In D-Ring Method (Strongest for Heavy Loads)
Use this method if your bag carries more than a phone, wallet, and keys.
Cut a fabric tab about 8 cm long and 4 cm wide from the same fabric as your bag, or from a sturdy canvas scrap. Fold it in half lengthwise and press.
Thread the D-ring onto the folded tab so the ring sits at the fold.
Pin the two raw ends of the tab to the side seam, with the ring pointing outward and the tab ends tucked inside the bag's top edge.
Stitch a box with an X through the middle using heavy-duty polyester or nylon thread. The box-X spreads the load across four stitch lines instead of one, which is the single biggest durability upgrade you can make.
Backstitch at both ends and trim the thread tails.
No-Sew D-Ring Method (Fastest, Light Loads Only)
Clip-on and clamp-style D-rings skip the needle, gripping the seam with a screw or spring mechanism.
Slide the clamp over the side seam at your marked spot.
Tighten the screw or snap the spring closed.
Tug firmly in three directions, up, out, and down, before you trust it.
Watch OutThe most common mistake is placing D-rings too high on the seam. Rings set right at the top edge put all the strain on the thinnest part of the bag and can tear through. Leave at least 2 cm of fabric above each ring, and if your bag is heavy canvas, add a small square of fusible interfacing behind each attachment point before you sew.
Which Method Holds More Weight?
A sewn box-X tab with interfacing generally holds more weight than a clamp-on ring on the same fabric, because the load spreads across a larger area. Carry daily with real weight inside? Sew the rings. Light summer tote for occasional use? Clamp-on rings are fine.
Sewing the Strap and Reinforcing for Heavy Loads
Heavy loads need more than a single line of stitching. Reinforcement at every stress point separates a strap that lasts years from one that fails in a month. Start with where the stress points are, then set the right strap length.
Where Tote Bags Actually Fail
A crossbody tote has four stress points. Reinforce all four and the bag will outlast the strap.
D-ring attachment points. The fabric around each D-ring takes the full bag weight. Reinforce with a box-X stitch and a square of fusible interfacing behind the fabric.
Strap-to-clip junction. Where the strap webbing meets the lobster clasp, the stitching takes repeated tugging. Sew a box-X here too, not a single line.
Strap adjuster slider. The slider slides under load and can fray webbing over time. Choose a metal slider over plastic for heavy bags.
Bag bottom corners. If the bag has a flat bottom, the corners carry the most weight when the bag is full. A row of backstitching along each bottom corner seam prevents blowouts.
Fabric Weight and Interfacing Choices
Match your interfacing to your fabric weight:
Fabric
Interfacing
Strap Width
Best For
Light canvas
Fusible mid-weight
2.5 cm
Everyday totes
Heavy canvas
Fusible heavy-weight
4 cm
Gear and groceries
Leather
Non-fusible sew-in
3.5 cm
Structured bags
Straw
None needed
2 cm
Light summer bags
Fabric weight decides how much reinforcement you need. A light tote sags under a heavy load without interfacing; heavy canvas holds its shape but still needs interfacing behind the D-ring attachment points, where force concentrates regardless of stiffness.
Strap Length and Fit: How to Measure
There is no single perfect number, because the right length depends on your height, build, and where you like the bag to sit. Measuring is more reliable than a formula:
Put on a strap or a piece of string crossbody, from one shoulder to the opposite hip.
Adjust it until the bag would sit at your hip or just above it.
Measure the length from end to end. That is your crossbody length.
For shoulder carry, measure again with the bag hanging under your arm on the same side.
An adjustable strap saves you from getting this exactly right. Strapistry straps adjust from 24" to 50", so one strap covers shoulder and crossbody carry.
A 2-inch (5 cm) strap spreads weight better than a thin one, which makes a heavy bag more comfortable to carry. For bags over about 3 kg, use a strap at least 4 cm wide; for a light everyday tote, 2.5 cm is comfortable.
Pro TipIf you are between two strap widths, choose the wider one. A slightly wide strap looks fine; a too-narrow strap on a heavy bag cuts into your shoulder within an hour.
Stitching the Strap Ends
Fold the raw end of the strap under by about 1 cm and press.
Thread the folded end through the lobster clasp or D-ring.
Fold again so the strap overlaps itself by about 3 cm.
Sew a box-X through the overlap with heavy-duty thread.
Backstitch at both ends.
Repeat on the other end. Hang the fully loaded bag from the strap for a minute before wearing it; if any stitch line looks stressed, add another row.
Best Detachable Straps for Leather Bags and Canvas Totes
The best detachable straps for leather bags and canvas totes share three traits: swivel lobster clasps, adjustable sliders, and width matched to the bag's weight.
Here is what to look for:
Swivel lobster clasp at both ends for easy on and off
Adjustable slider so one strap fits crossbody, shoulder, and short carry
2-inch webbing strap for heavy loads, narrower for light bags
Color Match connectors that blend into your strap's colorway if you want a tonal look
Signature Gold connectors in solid brass with a light-gold finish for a jewelry-style accent
Best ForBag owners who want one adjustable strap they can move between bags. Check each bag's handle loops or holes before you buy connectors.
Hardware Durability: What to Check Before You Buy
Hardware durability comes down to three checks most buyers skip: pull strength, finish quality, and the metal itself.
Run these tests before you commit:
Pull test. Clip the hardware to a fixed point and pull firmly. It should not bend or slip.
Weight test. Load your bag with its normal contents and carry it for ten minutes. Check for stretching or looseness.
Finish check. Run a thumb along the metal. Flaking or rough edges mean a cheap coating that will wear through.
Clasp check. Open and close the clasp ten times. A stiff or loose spring is a failure waiting to happen.
Common Mistakes to Avoid When Converting a Tote
Most failed conversions share the same mistakes, none about skill.
Stitching only one line. A single seam takes all the load and tears first. Use a box-X pattern.
Skipping the interfacing. Thin fabric sags and stretches under weight. Add interfacing at every attachment point.
Choosing the wrong strap width. A thin strap on a heavy bag cuts into your shoulder. Match width to load.
Ignoring strap length. A strap that is too short rides high and digs in. Measure before you cut.
Using weak thread. Standard thread snaps under load. Use heavy-duty polyester or nylon.
Conclusion
Converting a tote into a crossbody bag is one of the simplest upgrades to a bag you already love. The sewing route gives you full control over where the strap attaches. The no-sew route takes just a few minutes with no tools. If you'd rather skip the setup entirely, our Ready-Strap Totes arrive styled and ready to carry crossbody, shoulder, or backpack style.
Frequently Asked Questions
How to turn a tote bag into a crossbody bag?
You can convert a tote bag crossbody style in two ways. The no-sew method uses clip-on connectors that attach through existing handle loops or holes, letting you clip on an adjustable strap in a few minutes. The sewing method involves attaching D-rings to the bag's side seams with reinforcement stitching, then clipping or sewing a strap to those rings. Both approaches work on canvas, leather, and straw totes.
What are the best detachable straps for leather bags?
Look for straps with metal swivel clasps, since these generally hold up better than plastic clips under daily weight. Adjustable webbing straps with a slider let you set the length for crossbody wear. For leather bags, choose connectors that clip through existing hardware or handle loops rather than adhesive options, which do not bond reliably to leather over time.
Can you convert a canvas tote into a crossbody bag without sewing?
Yes. The no-sew crossbody bag hack works well on canvas totes because they usually have sturdy handle attachment points or grommet holes. Clip two connectors to the bag's existing loops or holes, then attach an adjustable strap between them. This method takes a few minutes and requires no tools. Check that each connector sits securely before loading the bag with heavy items.
How do I choose the right hardware for a DIY bag conversion?
Match hardware weight to what you carry. For light daily use, swivel lobster clasps in the 2.5cm to 3.8cm range work fine. For heavy loads like laptops or water bottles, choose sturdy metal D-rings and clasps with a stated load rating, and reinforce the attachment point with backstitching or a fabric patch. Test the clasp tension by hanging a loaded bag for a few minutes before relying on it daily.
So easy adding the anchors. Clipped the straps and carry my Bogg bag everywhere I go, I switch from backpack to crossbody most the time. I chose the light blue stripe straps. Love them..